Not a problem, as that’s exactly what the kiosk mode is all about. But before we even get to knowing how to configure Windows 10 kiosk mode, let’s take a look at what exactly this kiosk mode is, and when it can be used.
Kiosk Mode: What and When?
Also known as assigned access, the kiosk mode is exactly what it says on the box, and is intended to be used on Windows 10 PCs that are set up as kiosks. Using kiosk mode, you can restrict users into using only a specific (universal) app. This is achieved by setting up assigned access for a Windows 10 user account, and configuring it with the app its users are to be allowed access to. When kiosk mode is enabled, only the configured app runs automatically in full-screen mode, and cannot be exited normally, thus preventing access to other apps and files on the computer. In order to exit kiosk mode, the user account has to be logged out from in its entirety. The intended usage setting for kiosk mode/assigned access is for PCs that are set up for public access, as information kiosks. For example, if you want a Windows 10 PC to be used as a device on which people can get transit directions, you can configure a user account to be used with the Operating System native Maps app (or any other mapping app available from the Windows store). As another use case, if you want your kid(s) to be able to play only a specific game (downloaded from the Windows store) without messing up your important files, you can set up a separate account for them, and configure it using kiosk mode to allow access to only that game. Makes a whole lot of sense, right? Note: Kiosk mode only works with the (universal) apps that either come pre-installed with Windows 10, or are sourced from the Windows store. It can’t be used with traditional desktop applications.
How to Configure Kiosk Mode in Windows 10?
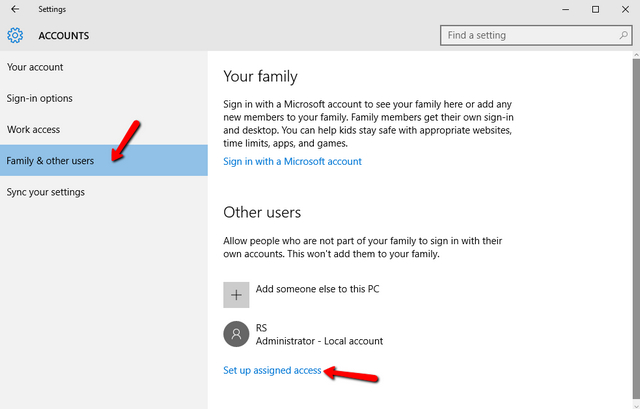
Setting up kiosk mode in Windows 10 is extremely simple. Assuming that you already have an account (which is to be configured) added on the target Windows 10 machine, the whole thing takes no more than a few mouse clicks. Here’s how to do it: Step 1: Fire up Settings > Accounts, and select Family & other users from the left pane. Now, under the Other users sub-section in the right, click on the Set up assigned access option.
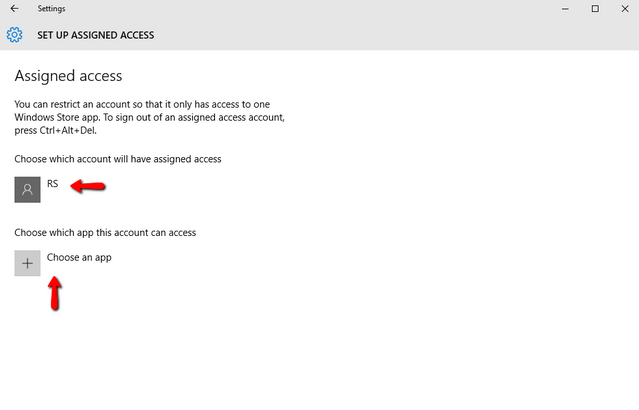
Step 2: On the next Assigned access screen, you can select both the account, as well as the specific app to be configured with assigned access/kiosk mode. Use the respective options to specify both. Once this is done, you have to restart the PC for the setting to take effect.
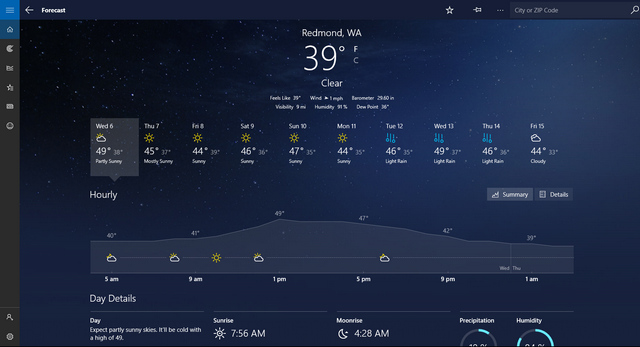
That’s all there’s to it! Going forward, whenever the configured user account will be logged in, the specified app will be launched automatically in full-screen mode, thus turning your Windows 10 PC into a kiosk. Apart from the configured app’s primary UI, nothing is visible on the screen. Even the app’s title bar, and the Start menu are disabled in kiosk mode. And if any attempts are made to exit the app, it’s automatically launched again. To exit kiosk mode (and subsequently, log out of the configured account), simply hit the Ctrl+Alt+Del hotkey combination. Piece of cake, right? Here’s a screenshot, illustrating the Windows 10 native Weather app, running in kiosk mode:
SEE ALSO: How To Refresh and Reset Windows 10
Set up a Windows 10 based information kiosk easily!
The kiosk mode is primarily intended to quickly configure Windows 10 PCs as information kiosks, and can be used to restrict user access to the PC as well. It’s simple, effective, and works just the way it’s supposed to. Try it out to see how it works out for you. Know of any other way(s) the kiosk mode/assigned access feature in Windows 10 can be used? Sound off in the comments below.